
Navigating the Landscape of iPhone Picture Rotation: A Comprehensive Guide
Related Articles: Navigating the Landscape of iPhone Picture Rotation: A Comprehensive Guide
Introduction
With great pleasure, we will explore the intriguing topic related to Navigating the Landscape of iPhone Picture Rotation: A Comprehensive Guide. Let’s weave interesting information and offer fresh perspectives to the readers.
Table of Content
- 1 Related Articles: Navigating the Landscape of iPhone Picture Rotation: A Comprehensive Guide
- 2 Introduction
- 3 Navigating the Landscape of iPhone Picture Rotation: A Comprehensive Guide
- 3.1 Understanding the Importance of Image Orientation
- 3.2 Exploring the iPhone’s Rotation Settings
- 3.3 Navigating Common Rotation Challenges
- 3.4 Frequently Asked Questions (FAQs)
- 3.5 Tips for Optimizing Image Rotation
- 3.6 Conclusion
- 4 Closure
Navigating the Landscape of iPhone Picture Rotation: A Comprehensive Guide
The iPhone, with its intuitive interface and powerful camera, has become an integral part of modern life. One of its many strengths lies in its ability to capture and store images effortlessly. However, the act of taking a photo is only half the story. The ability to effortlessly rotate images to achieve the desired orientation is a crucial aspect of the user experience. This article delves into the intricacies of iPhone picture rotation settings, exploring its importance, various methods, and potential pitfalls.
Understanding the Importance of Image Orientation
Image orientation, often referred to as "rotation," is the way an image is displayed relative to its original capture. It determines whether an image is upright (portrait), horizontal (landscape), or even rotated at an angle. While seemingly simple, this seemingly simple aspect plays a crucial role in how we perceive and interact with images.
Aesthetic Appeal: Correctly oriented images enhance the visual appeal of photographs. A landscape photo displayed in portrait mode can appear distorted and unnatural, while a portrait photo in landscape mode may lose its intended composition.
Functionality: In many cases, image orientation is not just about aesthetics but also about functionality. For instance, a document scanned in landscape mode might be difficult to read when displayed in portrait mode. Similarly, images shared on social media platforms often have specific aspect ratio requirements, demanding proper orientation.
Metadata Integrity: Image orientation information is embedded in the image metadata. This information is used by various applications and platforms to display images correctly. Incorrect orientation data can lead to images being displayed incorrectly, potentially impacting their intended use.
Exploring the iPhone’s Rotation Settings
The iPhone provides a comprehensive suite of tools to manage image orientation. These tools can be accessed through the native Photos app, third-party editing applications, and even through the iPhone’s settings menu.
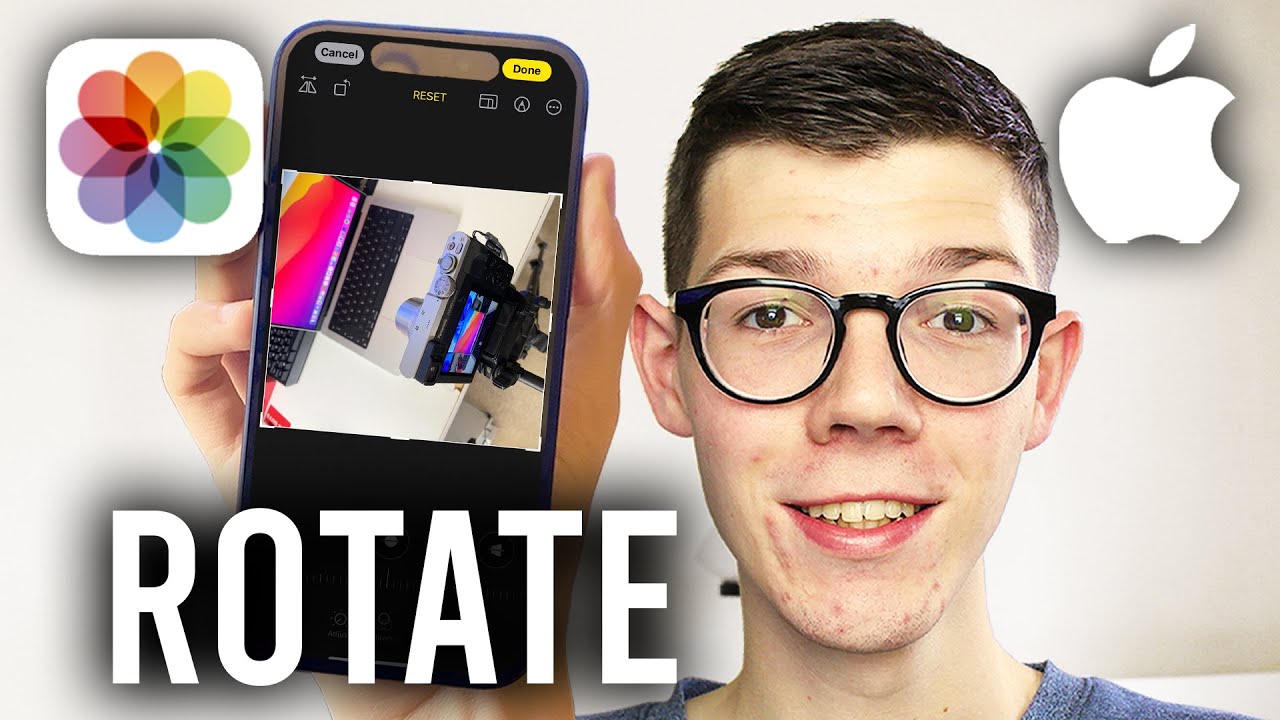
1. The Photos App:
The Photos app is the primary platform for viewing, editing, and managing images on the iPhone. It offers a straightforward method for rotating images:
-
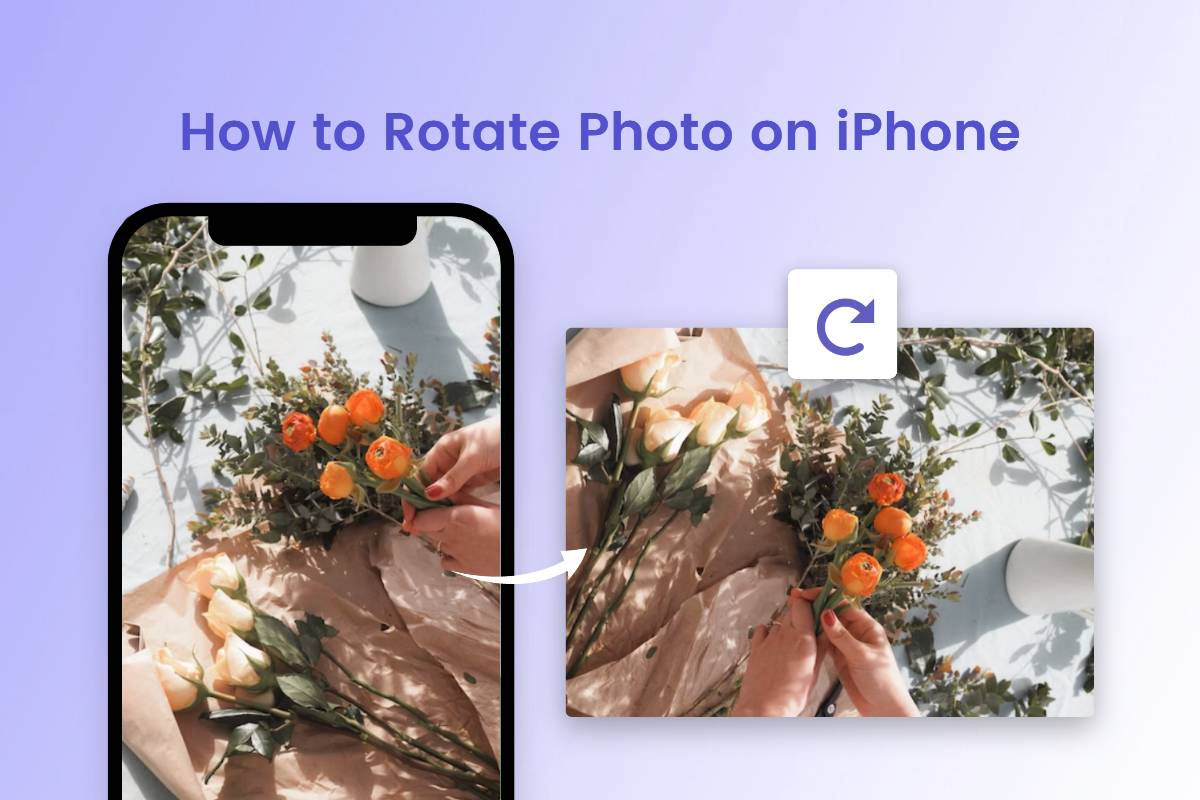
Rotating Images Within the Photos App:
- Open the Photos app and select the image you wish to rotate.
- Tap the "Edit" button in the top right corner.
- Look for the "Rotate" icon (a curved arrow) in the editing toolbar.
- Tap the icon repeatedly to rotate the image 90 degrees clockwise each time.
2. Third-Party Editing Applications:
A wide range of third-party photo editing applications offer more advanced rotation capabilities, including:
- Fine-tuning Rotation: These apps often allow for precise rotation adjustments, allowing users to rotate images by specific degrees.
- Straightening Images: Many apps include tools to straighten images, correcting any unintentional tilt or skew.
- Perspective Correction: Advanced editing apps offer perspective correction tools, enabling users to adjust the angles and lines in an image to create a more natural perspective.
3. iPhone Settings:
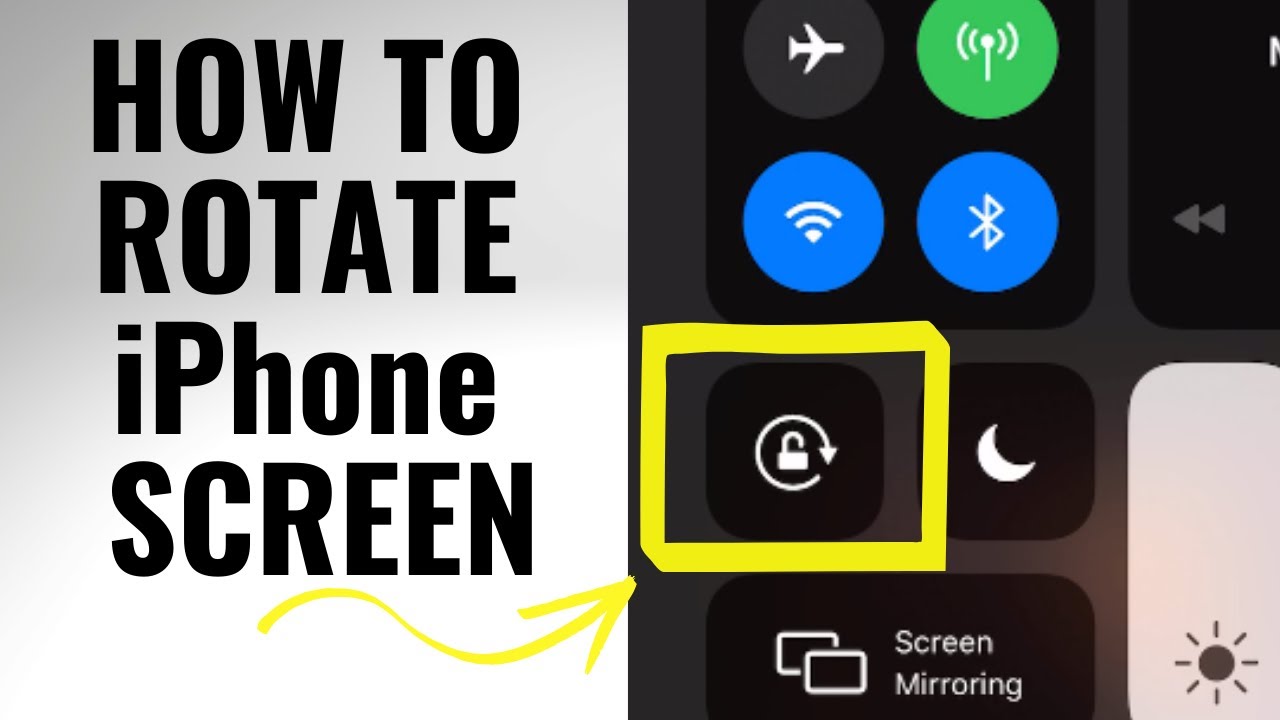
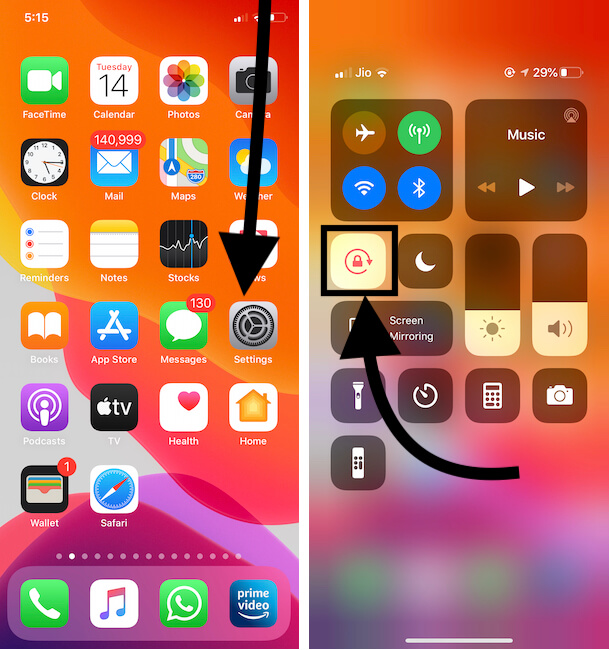
The iPhone’s settings menu also plays a role in image orientation, specifically through the "Auto-Rotate" feature:
- Auto-Rotate: This feature allows the iPhone’s display to automatically rotate based on the device’s orientation. While primarily used for videos and web browsing, it can also affect how images are displayed in certain apps.
- Disabling Auto-Rotate: Disabling Auto-Rotate prevents the display from rotating automatically, ensuring images are displayed in the orientation they were captured in.
Navigating Common Rotation Challenges
While the iPhone’s rotation tools are generally intuitive, certain situations can present challenges:
1. Incorrectly Captured Images: When an image is captured in the wrong orientation, it can be frustrating to rotate it afterward. This is particularly true for images captured with the iPhone’s front-facing camera, which often result in images being flipped horizontally.
2. Rotating Multiple Images: Rotating multiple images individually can be tedious. While the Photos app allows for batch editing, it doesn’t offer a dedicated option for rotating multiple images simultaneously.
3. Metadata Inconsistencies: Sometimes, the rotation information embedded in the image metadata might not accurately reflect the desired orientation. This can lead to images being displayed incorrectly in certain applications.
Frequently Asked Questions (FAQs)
Q: How do I rotate a picture on my iPhone without using the Photos app?
A: While the Photos app is the most common method, several third-party applications offer image rotation capabilities. Some popular options include Adobe Lightroom, Snapseed, and Pixelmator.
Q: Can I rotate multiple pictures at once on my iPhone?
A: The Photos app offers a batch editing feature that allows you to apply edits, including rotation, to multiple images simultaneously. However, it doesn’t offer a dedicated option for rotating multiple images at once.
Q: My iPhone automatically rotates images when I turn it sideways. How can I stop this?
A: The automatic rotation feature is controlled in the iPhone’s settings. To disable it, go to "Settings" > "Display & Brightness" and turn off "Auto-Rotate."
Q: How do I fix a picture that is upside down on my iPhone?
A: You can rotate the image using the Photos app’s "Rotate" feature or by using a third-party editing app. Rotate the image 180 degrees to correct the orientation.
Q: Why does my iPhone keep displaying pictures in the wrong orientation?
A: This could be due to incorrect metadata embedded in the image, a problem with the app you are using, or even a bug in the iPhone’s operating system. Try using a different app to view the image or restarting your iPhone to see if the issue persists.
Tips for Optimizing Image Rotation
1. Use the Photos App for Basic Rotations: For simple 90-degree rotations, the Photos app is efficient and user-friendly.
2. Explore Third-Party Apps for Advanced Editing: If you need precise rotation adjustments, straightening, or perspective correction, consider using a dedicated photo editing app.
3. Check Metadata Consistency: If images are consistently displayed incorrectly, examine the metadata associated with the images to ensure the orientation information is accurate.
4. Use a Consistent Rotation Method: Maintaining a consistent approach to image rotation will help ensure consistency across your photo library.
Conclusion
Image rotation is an essential aspect of managing and enjoying photos on the iPhone. The iPhone’s intuitive interface and various tools offer a range of solutions for managing image orientation. By understanding the importance of image orientation and mastering the available rotation methods, users can ensure their images are displayed correctly, enhancing their visual appeal and functionality.


Closure
Thus, we hope this article has provided valuable insights into Navigating the Landscape of iPhone Picture Rotation: A Comprehensive Guide. We appreciate your attention to our article. See you in our next article!